Sorry to those of you who saw this post in your reader and then it disappeared! I had it up for a day or two and then Blogger took it away and it never returned! Did this happen to any you? It was frustrating to say the least!
Anyway, this is so long overdue! A few of you had asked for a tutorial on this dress but last weekend we moved from South Carolina to Atlanta so things got super busy! I tried to get this tutorial put up before we left but I ran out of time.
The Frilly Wrap Dress
You will need: (for a 18 month/2T size)
1 yard of fabric (you will use all of the 1 yard for a 18 month/2T)
3 coordinating buttons
Disappearing pen or marker
Scissors
Thread
Ruler
A dress or shirt that currently fits your child (but doesn't have a ton of stretch)
I found it was much easier to do a paper pattern first for this dress so I taped 2 pieces of computer paper together so it would be big enough.
Now lay out your dress or shirt you are going to trace. If it has some stretch, make sure to add a bit extra (I usually add 1-1.5 inches extra). This was the first wrap dress I did and since I used broadcloth that didn't stretch, I used it for my pattern.
Trace around the top of your dress. I decided I wanted the sleeves a little capped so I went out a little at the shoulder on my paper. I added about a 1/2 inch seam allowance as I traced.
Fold your paper in half. We will cut in out folded in half so each side is symmetrical.
Cut it out
And unfold and now you have a perfectly symetrical top bodice piece! Grab another 2 sheets of computer paper and tape those together too for your back bodice pieces.
Trace the top piece we just made and cut out onto the new sheet of paper.
Fold in half again and cut it out. Now you should have 2 identical bodice pieces.
Grab one of your pieces and a straight edge or ruler. Make a line from the bottom right corner to about an inch or 2 to the left of the center collar. The closer you go to the center of the collar, the higher the cross top will be.
Cut down your line. I labeled the left and right side for future use.
Now cut down the middle of your other top piece. This will be the pieces that will button together in the back.
*Note: We will be folding the fabric in half to cut out our pieces so we have 2 of each piece. This is because we will be lining the bodice.
Fold your fabric over just far enough to cut the 2 back pieces and lay out your back pieces. Because we need some extra room for overlap with the buttons, give yourself about an extra inch on 1 piece and about 2 inches on the other. See how the one on the top has an extra inch on the side and the bottom one has 2 inches on the side?
Pin (or tape if you're lazy like me!) the pattern pieces down to the fabric and cut it out.
Now you should have 4 pieces: 2 left side and 2 right side.
Now it's time to cut out the front bodice pieces!
Lay out your left and right front pieces on the fabric and tape them down.
Cut them out! Now you should 4 front pieces as well: 2 left front pieces and 2 right pieces.
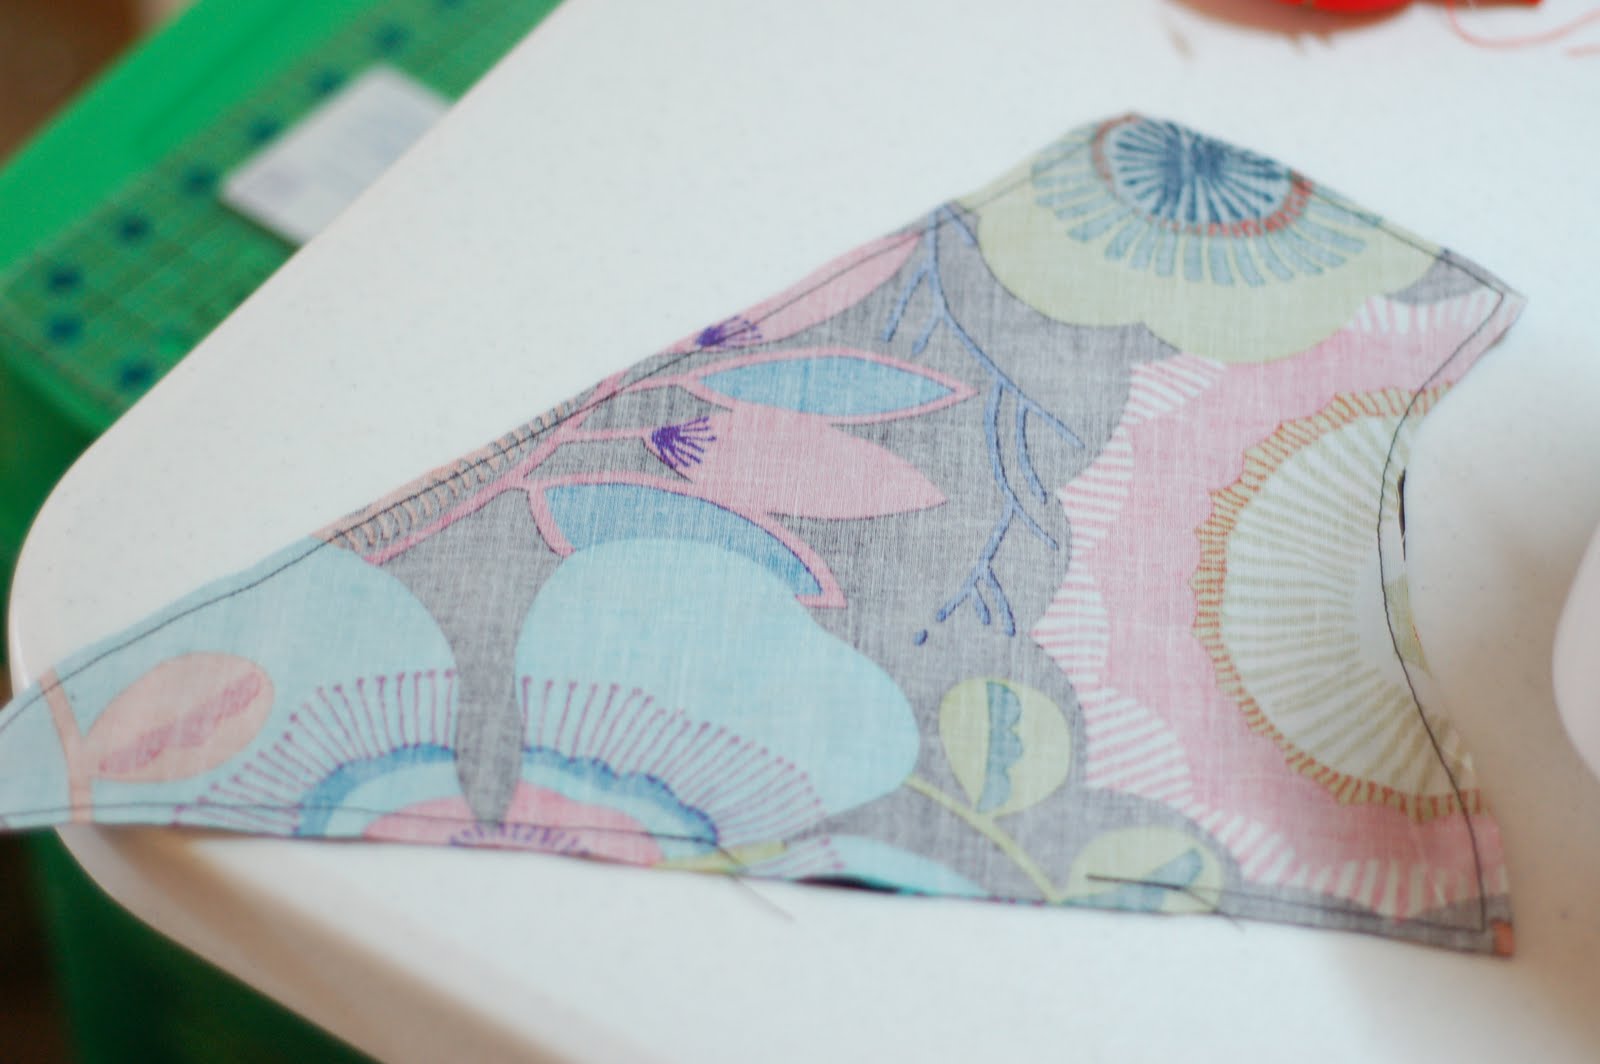
Now grab one side of your back bodice piece and line it up with the coordinating piece you cut it out with. Put them right sides together and pin around.
Now sew around where you've pinned making sure to leave a hole at the
bottom of the bodice. We will use that hole to flip it right side out.
This is the bottom of the bodice. See where the hole is?
Now flip it right side out. Use your fingers to push out the corners.
I know ironing can be a pain but it really helps this step look good. Iron down your piece so it's edge is nice and clean.
Repeat with the other side of the bodice: pin with right sides together, sew around leaving a hole at the bottom of the bodice, flip it right side out and iron it.
Now repeat with the 2 front pieces of the bodice. Place them right sides together, pin in place and sew around. Make sure you leave a hole in the bottom of the bodice on all pieces.
Flip both pieces right side out and iron them down. Now you should have 4 lined pieces: 1 left back bodice, 1 right back bodice, 1 left front bodice and 1 right front bodice.
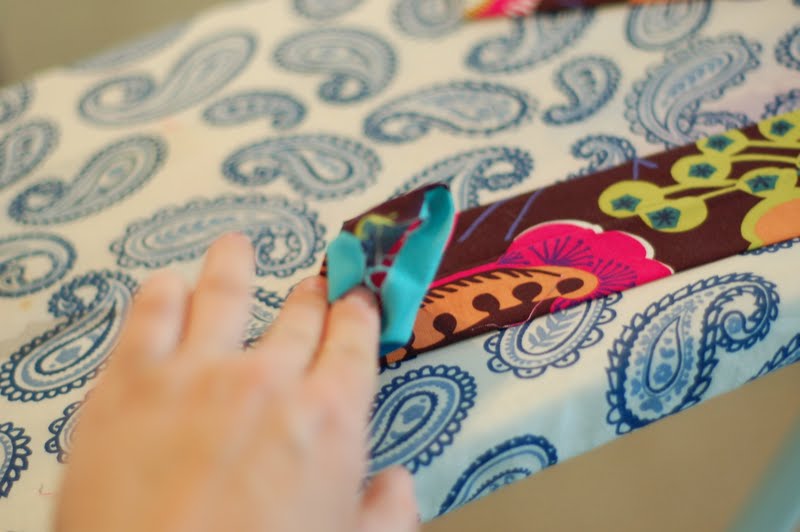
Now we are going to make our button holes so we can close up the back of the bodice. Grab your side that you made 2 inches longer (in my case it was the right side which is underneath shown above) and lay it under the other side. You want the longer side underneath so you have plenty of overlap with your buttons.
Grab a ruler and measure the length of your bodice (mine was about 6 inches). Then decide where you want your buttons and mark them. I did 3 buttons (but you could do more if you wanted) so I made my button marks at 1 inch, 3 inches and 5 inches so they were evenly spaced.
Once your buttonholes are marked, grab your button hole foot for your machine if you have it, if not you can manually make the holes (there are tons of great youtube videos on this)
Place your button in your buttonhole foot and squeeze the slider in so it knows how big your button is.
And attach your foot to your machine. It goes on the little silver bar just like your presser foot does. This is a side view.
Place your fabric underneath the buttonhole foot and find your mark you made for your button hole. I moved the fabric up another inch once I found the mark because it starts at the front of the button hole.
Pull down you pull the needle bar down making sure it's between the 2 plastic prongs. If you're confused about what I'm talking about see the
Easter dress tutorial for more pictures and an explanation of the needle bar.
Choose what kind of buttonhole you want and set your machine accordingly. You can see I prefer the round buttonhole which is #9 on my machine.
Now let her rip and make those buttonholes!
Now grab your seam ripper and gently open up your buttonholes
Now lay the buttonhole side again where you want it over the other side and mark through the buttonholes where the buttons need to be sewn on.
Sew your buttons where you've marked.
Now your top should button up nicely! Leave it buttoned for the future steps.
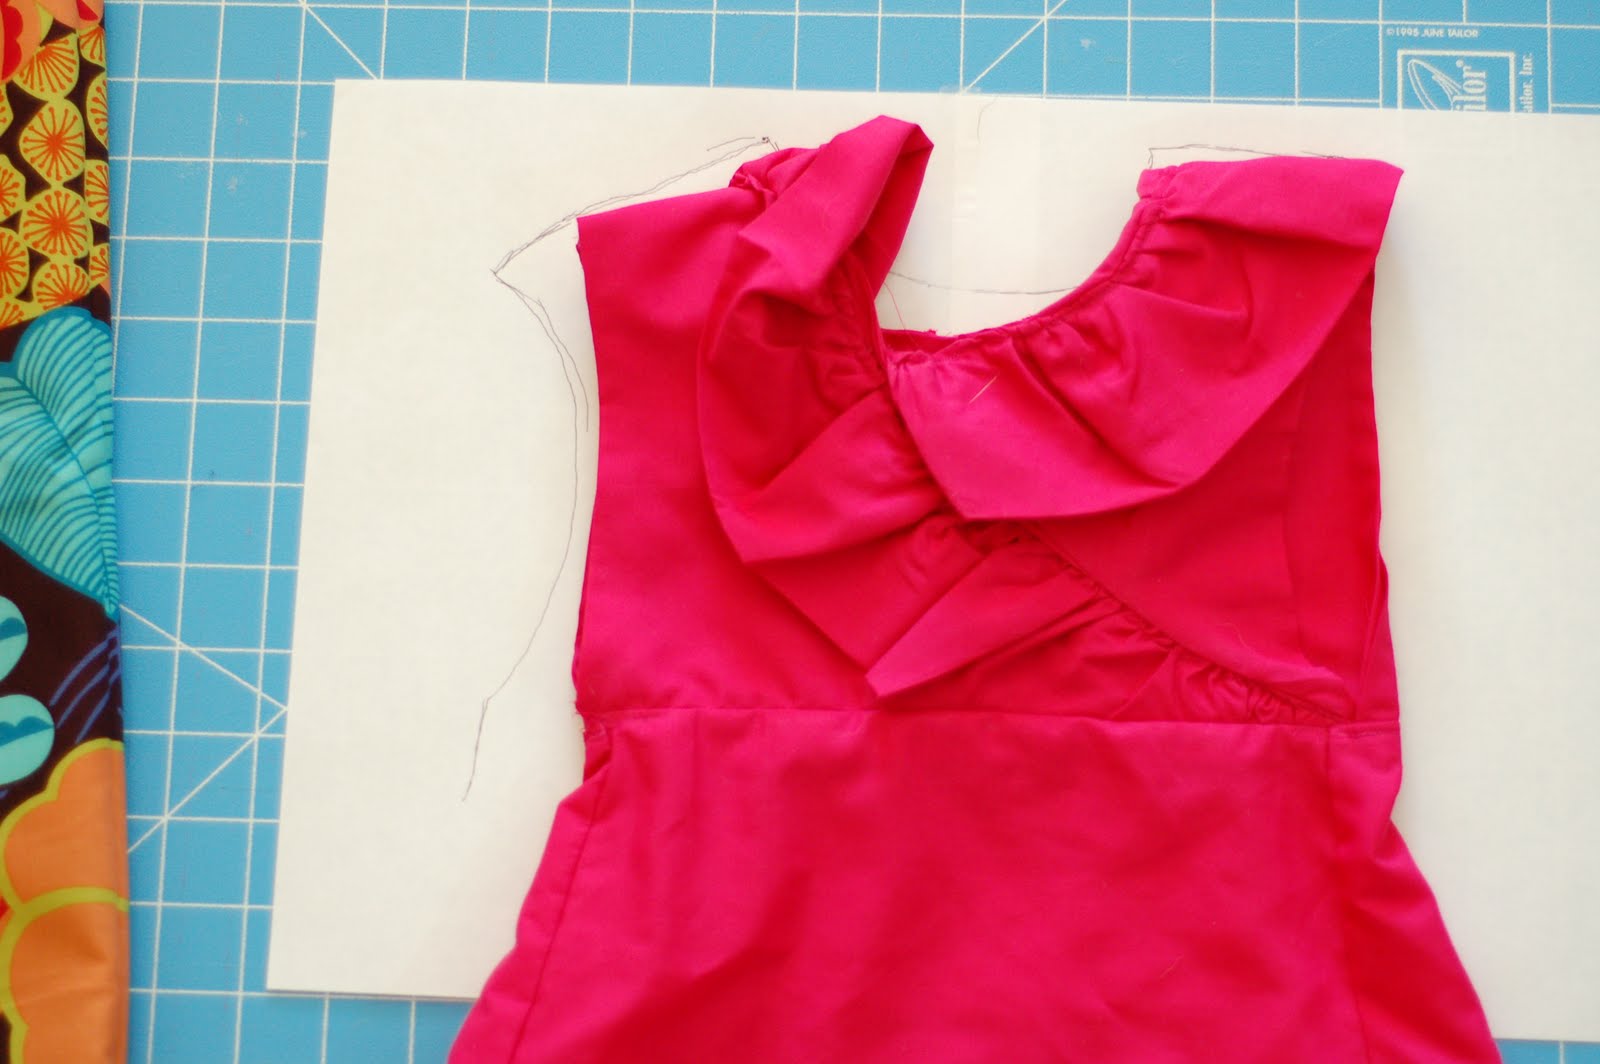
Now lay your front pieces where you want them with the
right sides together so you're working on the inside. Lay one side over the other and pin the shoulders once you have it where you like it. Then sew the shoulders with a tight zig zag stitch.
I went in and clipped them with pinking shears but you could also just cut the excess off with scissors.
Flip it right side out. You'll probably need to adjust your front wrap pieces again since they're not secured in place yet.
Now go back to what's left of your fabric. Measure from the button closure in the back of your bodice, around the neck to where you want the ruffles to end on the front. The side that wraps on top will be longer than the side that wraps underneath. Cut 2 strips about 1.5 times the length of each side. I like wide ruffles so i make them about 5.5 inches wide.
Take your strips and iron them in half with
right sides facing each other.
Sew down the side with a straight stitch.
And turn them right side out (I found that a safety pin works best for this). You should now have a tube.
Iron it down with the seam running down the center of the back. This will be hidden so nobody will see it unless you flip the ruffle up.
Now we are going to take care of the raw edges on the tubes. Take your fingers and roll it down into itself.
Iron it down so the raw edge is on the inside.
And sew it in place along the edge.
Now we are going to ruffle the strips. Set your machine to the longest straight stitch and go all along the edge of the strip, leaving the strings long at the end.
Now grab your long string and gather your strip until it's about the length you need.
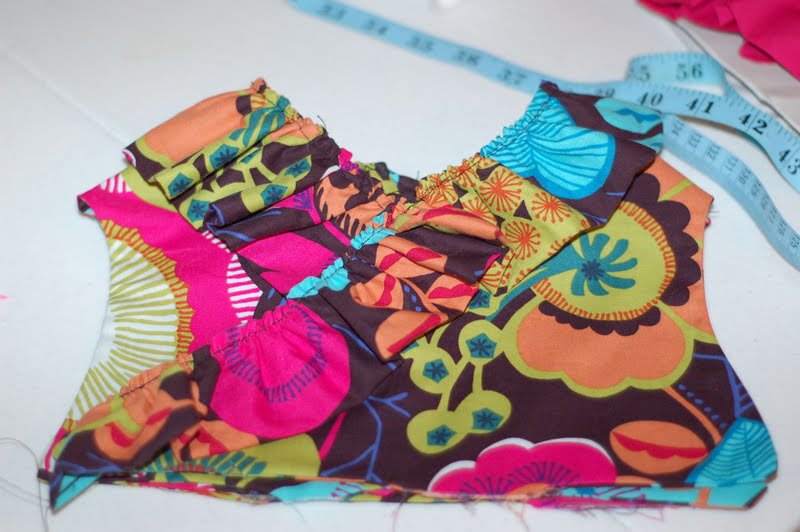
Pin it in place along the neckline starting with the buttons in the back and working up to the front.
I just pinned my short side first. See how I just stopped the ruffle shortly below where the right side wraps across. That's why that side is shorter.
Sew it in place. Sorry these pictures are horrible. We'd packed up all my lamps at this point so I didn't have much in the way of light!
Now take your longer strip and make that into a ruffle too by sewing a long running stitch along the side and then gathering up the ruffles to your desired length.
Now pin it in place front the buttons on the back all the way to the point at the front.
Sew it in place.
Now we're going to secure down those 2 front wrap pieces that i'm sure are driving you crazy at this point! Pin the top front and the button front pieces together. Make sure you don't pin them to the back of the bodice!
Now grab what's left of your fabric and cut it into a rectangle 1.5 times the width of the bodice at the bottom (where the skirt will connect to the bodice) and however long you want the dress to be. Hem the bottom. This is the skirt portion.
I did 2 rows along the bottom hem to make it look a little more finished.
Now grab your skirt part and put the right sides together and sew down the edge making it into a big tube or circle.
With your longest straight stitch again, sew along the top of the skirt and leave the strings long. Pull the strings and gather the fabric so it meets up with the bottom of the bodice.
Lay the skirt portion right sides facing inwards (or the inside of the skirt facing out as seen above) and lay it over the bodice (the bodice should be right sides out). The bottom of the bodice should be where the top of the skirt is now. Sew along that edge to connect the bodice and skirt.
Sorry this is not a very good picture of this step!
Flip the skirt down and now you have your finished dress! You can add another ruffle to the bottom like I did with this version if you want.
I ran out of fabric on this one because I measured a piece wrong and had to cut another so I had to skip the ruffle!
Hope you enjoy! Let me know if you have any questions and I hope you have a wonderful day! Thanks so much for stopping by!
XOXO


I love reading your blog :) I wish I had a sewing machine to do this stuff for Bella, one day!
ReplyDeleteFab tutorial! It may actually get me back to sewing a little bit!
ReplyDeleteThinking of fall wardrobe for kindergarten!
gaileee
http://love2sew4fun.blogspot.com/
Oh, and I've noticed blog posts missing too, and then coming back again!
Congratulations on being chosen as one of the winners in our button give-away competition.
ReplyDeletePlease could you let me know which postal address to send your buttons to.
Many thanks and warm regards,
Tamara and the ButtonMad Team
love it and i love that little model with no hair! my baby never had hair! thank you so much for commenting on my post.... i about died because i read your blog everyday!!!! EVERYDAY! like, have it saved to my favs and everything!!!! totally made my day. thanks woman!
ReplyDeletewow this is a fabulous tutorial and a really cute dress. nice job!
ReplyDeletekathryn
www.thedragonsfairytail.blogspot.com
Big X and O!
ReplyDeleteI am so impressed with this dress. I would need you to walk me through it though. I don't think my skills are quite there yet! :)
I love seeing everything you create!
Thanks for this great tutorial! I just stumbled on this blog. Looks like I'll be adding it to my favorites! So I have a question.... how do you finish the inside edges where you attached the skirt to the bodice?
ReplyDeleteHey Kristina!
ReplyDeleteSo glad to have you!! Great question too. I usually finish off the raw edges inside with a medium zig zag stitch after I attach the skirt portion, then trim the excess.
Awesome tutorial! :)
ReplyDelete